Newsletter
Send newsletter to recipients managed with Google Sheets
You are just a few clicks away from having your own newsletter system up and running! The following sections will help you getting started and to customize the example.
Get your free copy of the Newsletter
Getting started
You will have to perform a few simple steps until users can sign up for your newsletter.
After you have logged in to Ultradox and copied the example to Google Drive, you will find a number of files in the project folder.
Newsletter versenden! - Weiter zur deutschen Anleitung
Open the project folder on google drive
You will find the Newsletter Template that will be used to generate your newsletter, the Confirmation Template which contains the content of the email that will be sent to new subscribers to confirm their email address, the Subscribed Template that users will see after confirming their email and the Unsubscribed Template that will be shown when users unsubscribe from your newsletter survey.
You can simply open and edit these documents right from Google Drive as they are just ordinary Google Documents.
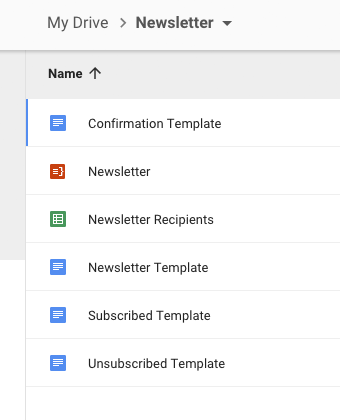
You will also find a Google Sheet called Newsletter Recipients that will contain the recipients of your newsletter survey and the footer with your Company address.
The red Newsletter file is the Ultradox Automation that contains all the actions to be performed whenever a user submits the form. When you open this file, you will see all the configured actions on the left.
Embed the signup form into your Website
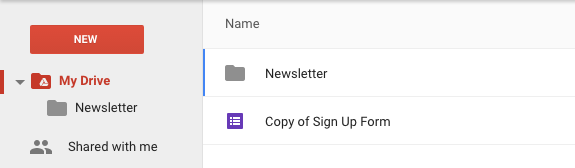
On the root level of your Google Drive you will also find a file called Copy of signup form which is the Google Form that the users will fill out to sign up. You may want to rename this file and move it into the Newsletter folder to keep all files in a single place.
To embed the signup form into your website click on the send button in Google Forms and copy the iframe source code into your website.

Make it yours
To create your own newsletter survey from the template just open the Newsletter template file and enter the desired content, replace or insert images and change fonts and colors.
You may also want to adjust the other templates: The Confirmation, Subscribed and Unsubscribed files will be sent out to your users whenever they confirm their email (double opt-in), when they are subscribed or unsubscribed from your list.
Open the Ultradox Email Designer sidebar to insert variables or to preview the resulting document.
Now you are ready to send out your news!
Once you are happy with the layout of the newsletter, select the recipients in the sheet and click on the play button in the menubar to send out a personalized newsletter to each recipient. Ultradox will only send out newsletter to recipients that are subscribed to the newsletters. All users with any other state than Subscribed will be skipped automatically.
If you want to send out a newsletters to a large number of recipients, just select the first row and click on the last row while holding down the Shift key and hit the play button.
That's it!
Now you can go to the live form by clicking on Form -> Go to live form to test if everything runs as expected.
Fill out the signup form and use your own name and email address for testing. In the spreadsheet Newsletter Recipients you will find the entered data as soon as the form is submitted. Ultradox will send out a confirmation email and will update the status in the sheet so that you can monitor your recipients.
Once the user clicks on the confirmation link in the email, you can watch the subscription state switch to Subscribed. In the same way the user will switch to Unsubscribed once the user clicks on the link to unsubscribe from your newsletter.
Activation
After you have copied the example, the signup form should trigger Ultradox when users submit the form. If no confirmation mails are being sent, please double check if the trigger has been activated.
No confirmation emails are sent out
Open the Newsletter Recipients sheet and launch the Ultradox Trigger from the Add-ons menu. You can either open the Newsletter Recipients Google Sheet right from Google Drive or by clicking on the edit icon in the building block referencing the sheet (see image).
In the Google Sheet you will find an Add-on menu that allows you to open the Ultradox Trigger sidebar.
If you do not see the Ultradox Trigger submenu, click on Get add-ons..., search and install the Ultradox Trigger Add-on.
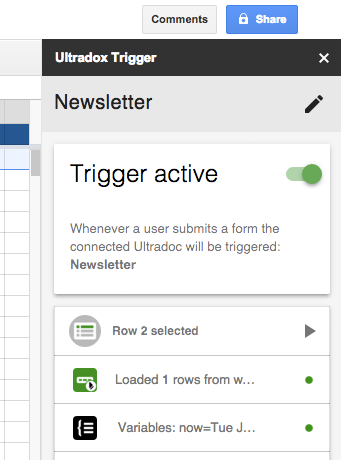
In the sidebar you will find a section where you can activate or deactivate the trigger. Click on the switch icon to activate the trigger.
Once the trigger is enabled the confirmation emails should be sent out.


Questions and Feedback
If you have any comments on this page, feel free to add suggestions right to the Google document that we are using to create this site.
If you are not yet member of the Ultradox community on Google+, please join now to get updates from our end or to provide feedback, bug reports or discuss with other users.
Last Updated: 12/20/18