Trigger Ultradox from zapier
zapier is a service that allows you to combine various web apps.
You can link an app like Dropbox with another app like Gmail and define automated processes like for every upload into your Dropbox you will receive a custom email from the interlinked Gmail app.
zapier features hundreds of apps, therefore a huge pool for automating activities between applications.
Ultradox also lets you automate processes between different applications but goes one step further:
You may extract and compile information derived from any connected app and generate entirely new documents using the gathered data.
zapier and Ultradox play together very nicely.
Use zapier to trigger your flow by one of of numerous supported applications and pass the information to Ultradox in order to process the data.
Topics
- How to prepare your Ultradox flow to be callable from zapier
- How to setup zapier to call Ultradox
Prerequisites
- You know how to use Ultradox and you know how to use zapier
- You have a flow that you want to trigger from zapier
Goals
- You get your flow called from zapier
Install zapier integration
To get access to the Ultradox Beta please access the following invitation-link:
https://zapier.com/app/login?next=/platform/public-invite/5074/56ddb753b1c0f15af077b1407acb0dd7
Currently the Ultradox integration into zapier is in Beta stage.
Simple example
Track incoming emails in a Google Sheet
In this example you will learn how to trigger Ultradox whenever a new email arrives in your inbox and how to configure Ultradox to track the email in a Google Sheet.
You could achieve the same result by using zapier alone. This example should just give you an idea how to connect Zapier with Ultradox and how to pass data from one app to the other.
Configure Ultradox
In your Ultradox file you will first need to add an Input Parameters building block (see related help for further information).
This building block actually defines which data is received from zapier whenever the Ultradox file is triggered.
The following short example uses an Input Parameters building block first, followed by an Insert Row building block that uses the information received from zapier.

As input fields sender, subject and date are received. The information is then entered as one row in a spreadsheet.
The Ultradox file is ready to connect with zapier.
Select the link icon in the menu bar and copy the access key of your Ultradox file.

Configure zapier
In zapier you will need to create a new Zap. Following our example you want your Zap to trigger the Ultradox for any email that is received.
So select the Gmail app in zapier and choose New Email as the Trigger.
This means zapier will check for new emails that are received with the connected Gmail account and triggers the Zap.
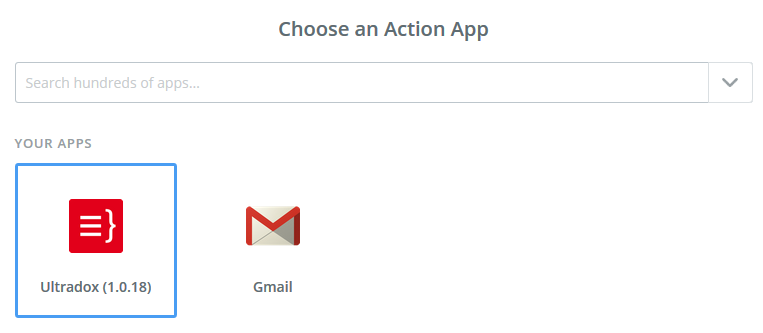
As an action that is triggered when an email is received you select Ultradox.

You want to connect the Zap with the Ultradox file you created in the previous step.
So you actually do not connect the Zap with your Ultradox account, but with the very specific Ultradox file you created.

Therefore you copied the access key of your Ultradox file.
Selecting Connect a New Account will open a new window.

Paste the Ultradox access key you have copied from the Ultradox file you would like to connect.

Now the Ultradox file is called by your Zap and because of the Input Parameter building block knows what information is required to trigger the action. You will be shown your three input fields and now need to select what information from the Gmail Trigger you would like to pass to your Ultradox file.
Obviously in our case you would like the sender, subject and date from the email to be sent in the referring fields.

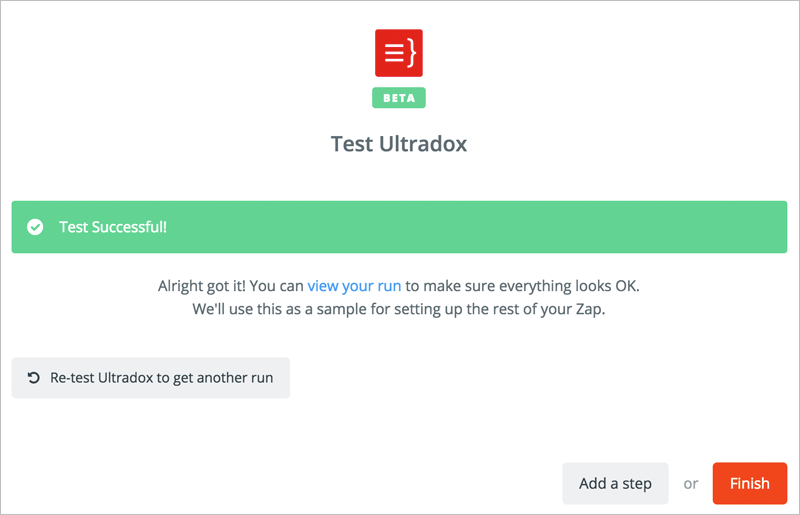
A quick test run will confirm your settings to be correct. You can then select “Finish” to create the Zap, give it a name and have it activated.
In this very example zapier will frequently check the connected Gmail account for new Emails. Every email triggers your connected Ultradox flow which uses the information that is provided to update an existing sheet with a new row.
This is only a short example to show how to connect a zapier Zap with an Ultradox file. Of course you can use all different apps in zapier to create another trigger. Something that happened in Dropbox, Evernote, SalesForce, Instagram,....
Depending on the Trigger information will be available that can be sent to Ultradox and used to compile reports, generate custom emails, backup data to Drive,...
Given the broad zapier app coverage and the advanced Ultradox information processing capabilities the possible use cases are endless.
Advanced example
Archive attachments with Zapier and Ultradox
In this real-world example we will take advantage of Zapier's trigger capabilities to archive attachments from emails on Google Drive.
Again you could achieve a similar result with using Zapier alone, but you can use this example as a starting point to build a sophisticated solution with Ultradox.
You could for example print the attachments on a cloud-ready printer, store them on Drive and share them with your team or add a signature to incoming PDF documents and archive them.
Using Zapier instead of Ultradox to trigger the flow whenever a new email arrives will consume less credits compared to the Archive attachments example.
Configure Ultradox
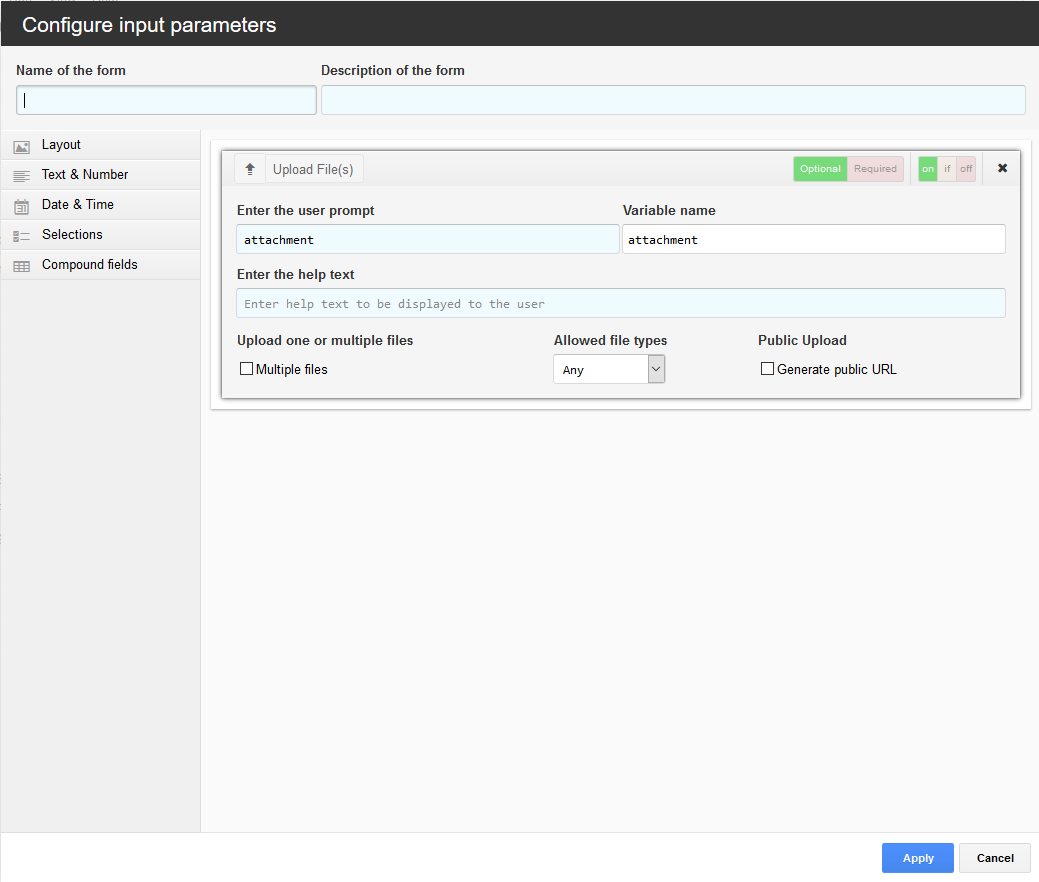
In your Ultradox file you will first need to add an Input Parameters building block (see related help for further information).
This building block actually defines which data is received from zapier whenever the Ultradox file is triggered.
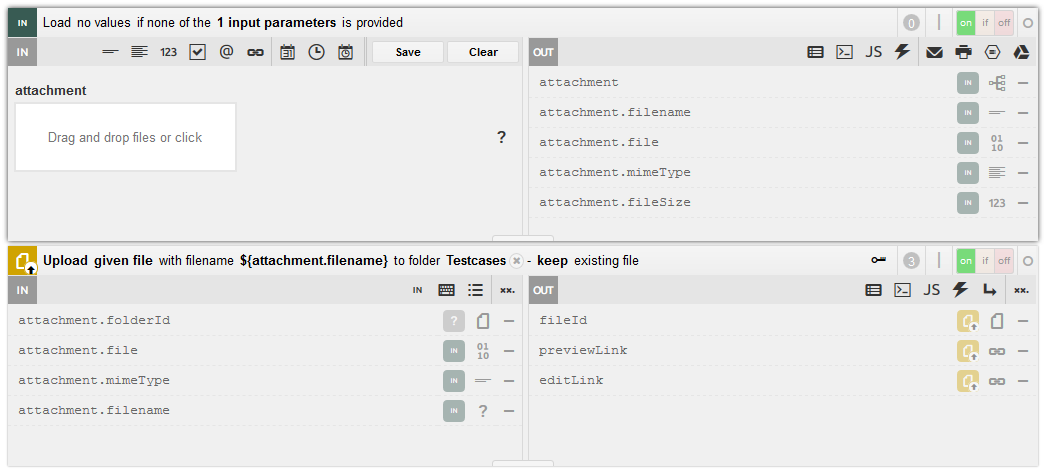
The following example uses an Input Parameters building block first. It contains an “upload file” variable called attachment, which can receive a file.
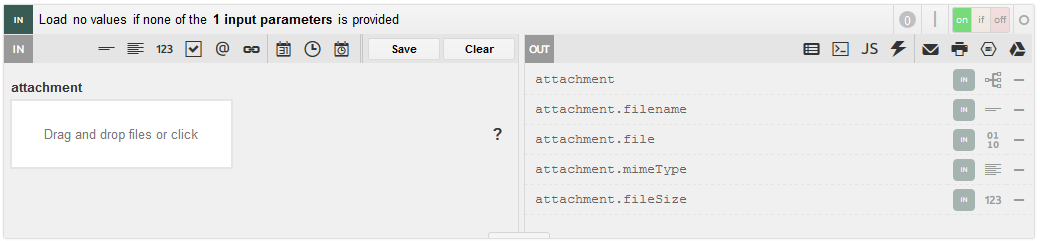
The output of an “upload file” variable is stored in the object attachment, which contains the files content in attachment.file and the filename in attachment.filename.
We use this information to upload a given file to Google Drive.
The Ultradox file is ready to connect with zapier.
Select the link icon in the menu bar and copy the access key of your Ultradox file.

Configure zapier
In zapier you will need to create a new Zap. Following our example you want your Zap to trigger the Ultradox for any email that is received.
So select the Gmail app in zapier and choose New Email as the Trigger.
This means zapier will check for new emails that are received with the connected Gmail account and triggers the Zap.
As an action that is triggered when an email is received you select Ultradox.

Be sure that you have a new/unread mail with an attachment before fetching the samples. You’ll find an email containing the all_attachments variable.

You want to connect the Zap with the Ultradox file you created in the previous step.
So you actually do not connect the Zap with your Ultradox account, but with the very specific Ultradox file you created.
Therefore you copied the access key of your Ultradox file.
Selecting Connect a New Account will open a new window.
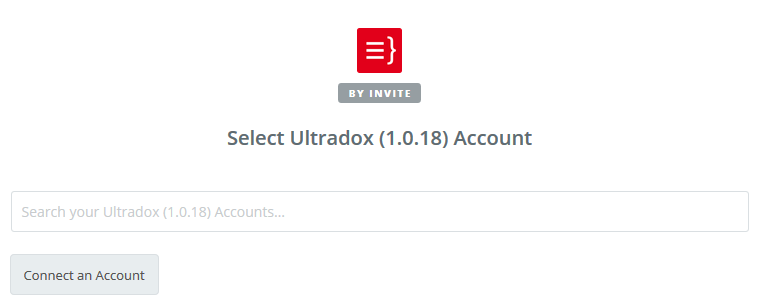
Paste the Ultradox access key you have copied from the Ultradox file you would like to connect.

Select the newly created account.

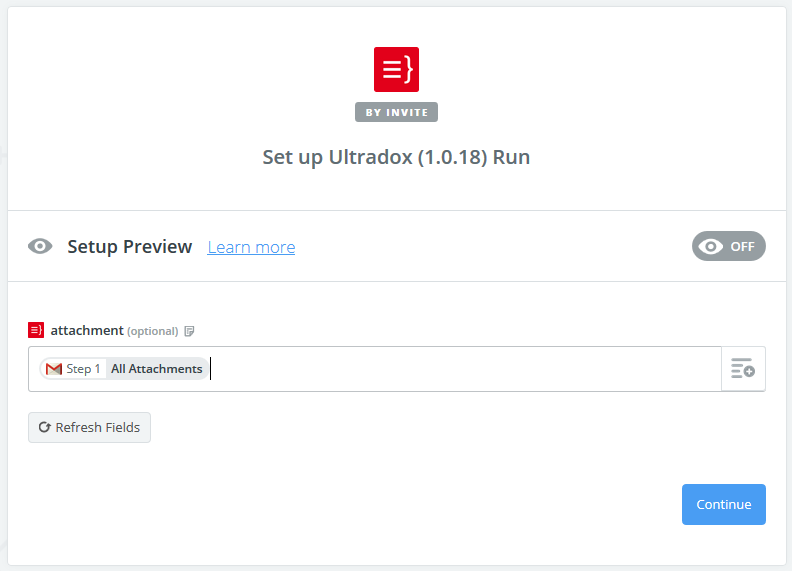
Now the Ultradox file is called by your Zap and because of the Input Parameter building block knows that a file variable attachment is required to trigger the action. You will be shown an input field and now need to enter the all_attachments variable.
A quick test run will confirm your settings to be correct. You’ll see a log message in your flows console, stating that a file has been uploaded to Drive.
You can then select “Finish” to create the Zap, give it a name and have it activated.

In this very example zapier will frequently check the connected Gmail account for new Emails. Every email triggers your connected Ultradox flow which uploads the attachments to a folder in Google Drive.
What you have learned
- You have learned how to connect Zapier with Ultradox and take advantage of the strengths of each platform.
Questions and Feedback
If you have any comments on this page, feel free to add suggestions right to the Google document that we are using to create this site.
If you are not yet member of the Ultradox community on Google+, please join now to get updates from our end or to provide feedback, bug reports or discuss with other users.
Last Updated: 17.09.18