Send email from different address
Introduction
With Ultradox you can send emails from different sender addresses (also known as send-as alias) using different email providers like GMail or Amazon SES. This flexibility comes with the cost of a slightly more complex configuration.
Follow the steps in this guide carefully to setup another sender address.
Verify sender address
Ultradox supports different email providers, so when adding another sender address you will first have to pick the email provider (e.g. GMail, Amazon SES) to verify the new email address.
First of all you will have to add an email building block (either plain text or HTML email) to your flow.
Then click on the cog icon with the @ symbol in the toolbar of the email building block.
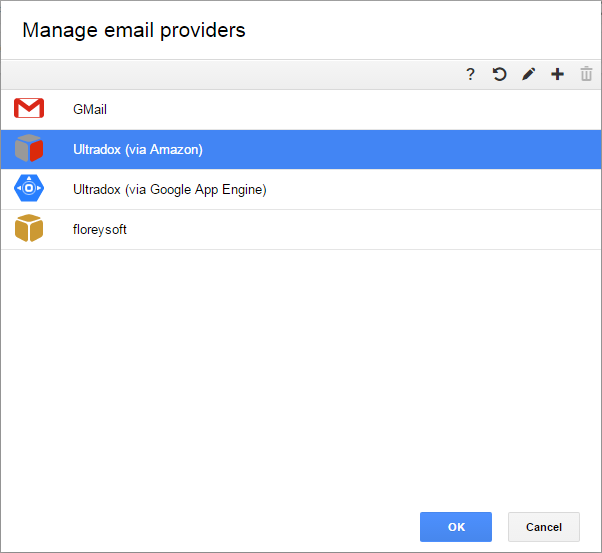
A dialog will open that show a number of email providers, depending on your configuration.
The easiest way to add a new sender address is via using the Ultradox provider.
Select Ultradox (via Amazon SES) and click on the edit icon with the pen in the toolbar.
Another dialog will open that allows you to change the name of the provider and to manage the email addresses that can be used to send out emails using this provider.

To add another address enter the email address and click on the + sign to send out a verification email.
You should find the verification email in the inbox of the entered address very soon.
Click on the link in the email to confirm that you own the email address.
Click on the refresh icon beside the verified addresses drop-down to reload the list of verified sender addresses from the email provider. The newly verified email should show up.
Close the dialog as we now have verified and added the desired sender address to the selected email provider.
Adding another sender address to GMail will only work if you are logged in with a Google G Suite admin account and if the email address that you've entered is either a valid domain user or a registered email group.
Configure the sender
When sending an email you can pick the desired email account to be used for sending the email.
|
|||
Click on the bold text in the title of the email to open the email dialog.

The first box displays the sender as it will show up in your recipient's inbox. The second box shows the sender email address that will be used when sending out the email. The drop-down allows you to pick a different sender.
Click on the settings icon with the cog next to the sender drop-down box to open the dialog that lets you manage configured email accounts.
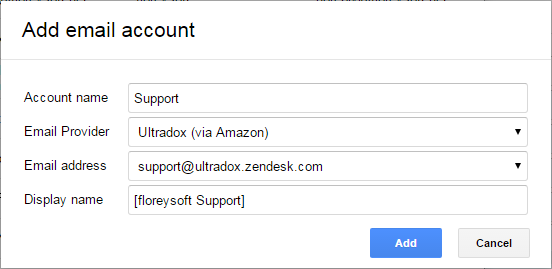
Add a new account by clicking on the + icon.
You can then give your new account a name that can later be used to select the account from the drop-down box.
Select the email provider Ultradox (via Amazon)as this is the one we've been using to verify the new address.
Select the verified address that you want to use and enter a display name which will be shown as sender in the inbox of your recipients.
Close the dialog and click on the refresh icon to reload the list of email accounts.
If you have added a new email account it may take a while until the new account shows up, so refreshing the list after a while may help.
Selecting an account and clicking on the edit icon will allow you to change the account name which will be displayed in the drop-down, the email address and the display name.
Questions and Feedback
If you have any comments on this page, feel free to add suggestions right to the Google document that we are using to create this site.
If you are not yet member of the Ultradox community on Google+, please join now to get updates from our end or to provide feedback, bug reports or discuss with other users.
Last Updated: 9/25/17